The Platinum / Palladium Printing Process
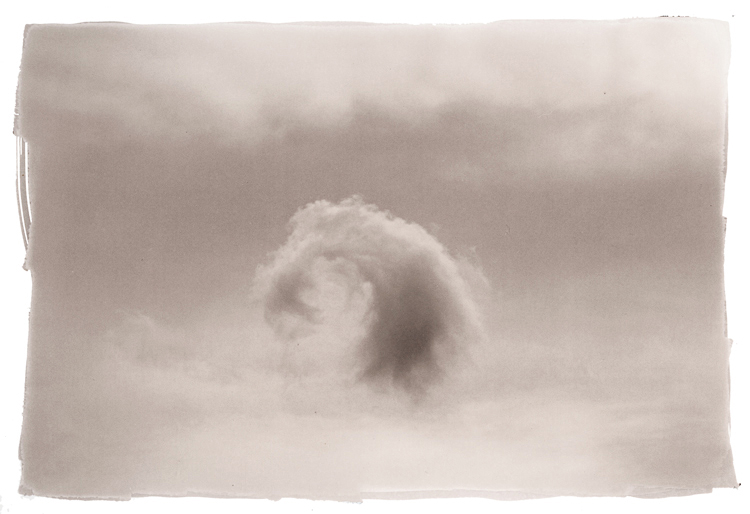
platinum / palladium print, 14 x 11 in, 2008
This is an alternative photographic process, pursued by such artists / photographers as Alfred Stieglitz and Edward Weston during the early 20th Century. More recently, both Robert Mapplethorpe and Irving Penn - among others - have also worked with this process.
When using this technique, the freedom and control of this medium gives the photographer endless possibilities to craft the image. In addition, this technique allows the opportunity to combine both the power and precision of modern technologies with the charm and passion contained in the oldest photographic processes.
While considered the apex of the many alternative processes, the « Platinotype » is a photographic printing process patented by William Willis in 1873. This was preceded by a succession of experiments by various photographers and scientists, commencing around 1830. During World War I, platinum prices soared due to their function as a catalyst in explosives. As a result, photographers needed to investigate other photographic processes - gelatin silver among them. Soon, ready-coated platinum papers disappeared from the marketplace. When rediscovered around the 1960’s, « Platinotype » was once again embraced because of the immense tonal range this technique allowed each photograph. A primary advantage of this technique is the impregnation of finely divided platinum / palladium salts into the paper’s fibers - allowing the image to be as long sustaining as the fine paper the image is printed on. The platinum / palladium process is an extremely slow print-by-contact method requiring very strong UV light, and requiring that the negative be the same size as the desired print.
Artist’s paper is sensitized by brush-coating a mixed solution of ferric salts (UV light sensitive) and chloroplatinite and / or chloropalladite salts. Once dry, the paper is exposed to UV light in tight contact with the negative. Processed after development in a solution of potassium oxalate, ammonium citrate or other developers suitable for the Pt/Pd print, the photograph is composed of platinum (and or palladium), lending the image a subtle tonality that can vary from cold metallic to warm red tone, depending on the noble metals used in the mixture preparation.
As of today, platinum and palladium prints are increasingly sought after by galleries, museum curators and fine-art collectors, who appreciate them for their stability and their unrivalled beauty.
- José Miguel Ferreira
Platinum / Palladium Tutorial :
Click here to view a full demonstration of a typical
platinum / palladium printing session
on my website: www.jmf-photo.net
Cliquez ici pour la version française de la
démonstration de tirage Platine / Palladium
The Dry Workspace
This is the general view of the area where paper is "sensitized" with the platinum / palladium solution.
Try to keep it as dust free as possible.
Although Total darkness is not necessary, it should be lit to a minimum (not more than a 40W light bulb).

In detail, we find here:
- the brush on the left, anti-static, to clean the paper from small particles and dust;
- The brush on the right (lying on top of a half-filled glass of water), to apply the solution on the paper;
- The 4 bottles of solutions: ferric oxalate, palladium, platinum, and contrast agent;
- A pencil to mark with small marks the four corners as an aid as to where to apply the solution on the sheet of paper;
- A small glass to mix the solutions;
- A syringe to extract the mixed solution from the glass;
- Black tape to cover eventual spills outside of the image area;
- Two clips to hold the sheet of paper firmly under a hand-made mat.

On the opposite side of the above table:
- The UV light box, with a bank of 12 UV light neons (light box size: 16x20 inches);
- On top of the light Box lies the contact print frame;
On the right of the light box, there's windex and paper to clean the glass of the contact print frame. Do it before each exposure;
- On the left of the light box there's a stopwatch to measure the exposure and a knife to help remove the eventual small pieces of black tape (after exposure).

Prior to apply the solution, the sheet of paper must be humidified.
This is easily done with two trays:
The bottom tray is half filled with water and has a "web" of nylon strings so the sheet of paper can lie on the strings without touching the water, "emulsion side" facing down.
The upper tray covers the bottom tray thus creating a "humidifier box".

The closed "humidifier box".
Normally, but depending on the season and room's hydrometry, 30 minutes are enough to humidify the sheet of paper.
Humidifying the paper helps the solution penetrate better in the paper fibers.

Preparing the solution:
Depending on the size of the image, mix the required amount of drops of ferric oxalate and - in this case - palladium. The amount of drops must be identical, for example, 15 drops of ferric oxalate + 15 drops of palladium. If necessary - almost always - add a contrasting agent, in this case, Na2 (Sodium platinum).
Mix well the solution by rocking the glass.
Avoid stirring the solution bottles before taking solution with the pipette.

Place the negative in the middle of the sheet of paper, and, With the pencil, gently mark the 4 corners of the image. This will be a visual aid as where to apply the solution with the brush.
When this is done, Put back the negative in a safe place.

Clean the sheet of paper With the anti-static brush and place it under the mat. The clips will help keeping the sheet of paper firmly under the mat while brushing the solution.
Extract the solution with the syringe and gently pour the solution on the paper. This should be done as quickly as possible but slow enough not to spill drops of solution outside of the image area.
The mat also helps keeping the drops and brush in the image area.
Extract the solution with the syringe and gently pour the solution on the paper. This should be done as quickly as possible but slow enough not to spill drops of solution outside of the image area.
The mat also helps keeping the drops and brush in the image area.

With the brush, start by quickly and gently spread the solution all over the image area.
Try not to let the solution lie too long in the same place, this could create undesirable marks and blotches.
Try to avoid letting hair, fabric particles and dust fall in the image area.
Try to make the solution spread and penetrate the paper as quickly as possible but always in a gentle way.

This is the sheet of paper after finishing brushing once all the solution has penetrated the paper fibers. Make a close inspection of the image area to look for particles, hair, dust or any other extraneous elements. If found, they can be removed with a little piece of scotch tape (or the sticking side of a small post-it). After removing any eventual particle, it will leave a small mark. Brush gently over it and it will disappear. Dip the brush in the glass of water to avoid the solution drying on the brush, otherwise this could contaminate the next sheet of paper.
Place the sheet of paper in a dark place to dry. Avoid drying the paper with a hair-dryer. It's better to let it dry naturally.
Wash the brush, syringe and small glass as quickly as possible under running tap water.

Once the sheet of paper is totally dry, it is ready for exposure.
clean the glass - interior side - of the contact print frame with windex and paper.
With the anti-static brush, remove any particles and dust from the negative.
Place the negative (emulsion side down) on top of the sheet of paper, covering the image area.

Firmly holding the paper and negative together, place them upside-down in the contact print frame.
Close the split-back gently as the air displacement could move the sheet of paper, resulting in the negative not being lined-up with the image area.
close the split-back with the leaf springs.

Turn around the contact print frame and check if the negative is lined-up with the image area of the paper. Check also for dust, or any other particles. If necessary, re-open the contact print frame and clean the negative or glass.
clean the glass - exterior side - of the contact print frame with windex and paper.
Insert the contact print frame in the UV light box, glass side up.
Set the timer (or stopwatch) to the correct exposure time. The exposure time varies depending on the calibration you have previously fine tuned, negative density and desired print density.
Insert the contact print frame in the UV light box, glass side up.
Set the timer (or stopwatch) to the correct exposure time. The exposure time varies depending on the calibration you have previously fine tuned, negative density and desired print density.

Here is the contact print frame - glass side-up - inside the UV light box. The UV light can be seen in blue.
The light box was left open only for the purpose of this photograph.
Do not look in to the UV light !
Do not expose your skin to the UV light !
Do not expose your skin to the UV light !
Always keep the UV light box closed during exposure !
After exposure, the sheet of paper is ready for development and processing.

The wet workspace
This is the general view of the area where the sheet of paper is going to be developed and cleared.
You'll need 4 different trays:
1 developer tray
3 clearing agent trays
Try to keep it as clean as possible.

Lying on a heater, in a dedicated saucepan filled with water, a jug with developer.
developer temperature influences print tonality; the higher the temperature, the warmer the tone of the final print. In this case developer is heated between 60° and 70° Celsius.
As you can see in the image above, the jug is covered with a lid to minimize developer evaporation due to the high temperature.
developers can be:
- Potassium Oxalate (in the picture)
- Ammonium Citrate
... and many others
(see resources below)

The 3 jugs with the clearing agent.
Clearing agents can be:
- EDTA Tetra Sodium
- Kodak Hypo Clearing agent
... and many others
(see resources below)
Clearing agents can be:
- EDTA Tetra Sodium
- Kodak Hypo Clearing agent
... and many others
(see resources below)

On the sheet of paper, in the latent image, We can already see what will be the darker areas of the final print.
If the tray is dry and clean, place the sheet of paper inside.
If the tray is wet, wait until the last moment before pouring the developer, otherwise stains will show up in the final print due to drops of water in the tray.

Pouring the developer is tricky; you must do it very quickly so as to get the developer over the sheet of paper at the same time, otherwise you will have uneven areas on the print's image.
On the other hand, you must be careful enough not to spill developer all over the place and / or burn yourself.

As soon as you pour the developer over the sheet of paper, the image appears instantly.

Keep gently rocking the tray for 2 to 3 minutes to fully develop the image.
When development is complete, Pour back the developer in the developer jug.

Try to keep the developer tray away from the clearing bath trays. Otherwise Clearing agents (even a drop) will contaminate the developer and you must discard it. you can keep using the same developer over and over again. Just add fresh developer once in a while as some developer will be absorbed by the dry paper and evaporated because of the heat.

After development, the image will be fully visible.
A yellow cast will still be visible over the whole image, but it will gradually disappear as the print goes through the next 3 clearing baths.

After development, wash the print under tap water. Fill half the tray while rocking it.
Do this twice.
Try to keep the running water away from the image area. At this stage, the paper in general - and the image area in particular - is very fragile.

When the post-development washing is done, gently pick up the print by a corner and place it in the first clearing bath tray.
Always use the same trays for the 3 different clearing baths.

Gently pour the first clearing bath over the image. Rock the tray for 5 minutes.
When this is done, pour back the first clearing agent in the jug.
Just like after development, wash the print under tap water. Fill half the tray while rocking it. Do this twice.
Carefully pick up the print by a corner and place it in the second clearing bath tray.

Gently pour the second clearing bath over the image. Rock the tray for 5 minutes.
When this is done, pour back the second clearing agent in the jug.
Just like after the first clearing bath, wash the print under tap water. Fill half the tray while rocking it. Do this three times.
Carefully pick up the print by a corner and place it in the third clearing bath tray.

Gently pour the third clearing bath over the image. Rock the tray for 5 minutes.
When this is done, pour back the third clearing agent in the jug.
Just like after the second clearing bath, wash the print under tap water. Fill half the tray while rocking it. Do this four times.
Carefully pick up the print by a corner and place it in the pre-washing tray.

Leave the print in the pre-washing tray (on the left) at least half an hour.
This can be done in a bath tube, where you can setup a "cascading" system where water comes from the shower into the washing tray. The washing tray has 4 holes that let water flow into the pre-washing tray. Water doesn't have to be rapidly flowing. You can keep it to the minimum.

After 30 minutes, and after having washed your hands, remove the print from the pre-washing tray and move it up to the washing tray.
Let it wash for at least 30 minutes.
When washing is complete, you can hang the print to dry in a cloths line.
It will dry in about 5-6 hours or you can leave it to dry overnight.
Voila !

Photographers' Formulary
Print conservation report :
click here to view the full analysis report
of the author's platinum / palladium prints
(performed by the Getty Research Institute)

platinum / palladium print, 14 x 11 in, 2008
Click here to see more Platinum / Palladium Prints


No comments:
Post a Comment